
| 일 | 월 | 화 | 수 | 목 | 금 | 토 |
|---|---|---|---|---|---|---|
| 1 | 2 | 3 | 4 | |||
| 5 | 6 | 7 | 8 | 9 | 10 | 11 |
| 12 | 13 | 14 | 15 | 16 | 17 | 18 |
| 19 | 20 | 21 | 22 | 23 | 24 | 25 |
| 26 | 27 | 28 | 29 | 30 | 31 |
- spring security
- Git
- 클린 코드
- 코드업
- Postman
- MySQL
- 파이썬
- go
- 스프링
- H2 설치
- golang
- 기초100제
- 클린코드
- Vue.js
- Python
- Gradle
- Spring
- 티스토리챌린지
- Spring Boot
- java
- GitHub
- 롬복
- springboot
- thymeleaf
- JPA
- Codeup
- 오블완
- mariadb
- 알고리즘
- 객사오
- Today
- Total
nyximos.log
Spring Boot + MySQL + JPA + Thymeleaf 로 CRUD 구현하기 04 타임리프 레이아웃, 회원가입 구현 본문
Spring Boot + MySQL + JPA + Thymeleaf 로 CRUD 구현하기 04 타임리프 레이아웃, 회원가입 구현
nyximos 2022. 8. 12. 00:34Spring Boot + Gradle + MySQL + JPA + Thymeleaf 환경에서 간단한 CRUD 예제를 만들어보자
이번 포스팅에서는 타임리프 레이아웃을 적용해보고, 회원가입을 구현해보자.
주요 기능
회원가입
로그인
게시글 등록
게시글 수정
게시글 삭제
게시글 조회 (일반 회원 조회수와 운영자 회원 조회수 따로 구분)
게시글 추천
Thymeleaf는 th:insert나 th:replace를 이용하여 다른 파일을 불러올 수 있다.
th:href
@{ } 안에 URL 지정
https://www.thymeleaf.org/doc/tutorials/3.0/usingthymeleaf.html#link-urls
th:replace
기존 내용 완전히 대체
th:replace="파일경로 :: fragment이름이나 선택자"
:: 뒤에 생략하면 해당 파일의 전체 내용을 가져온다.
th:insert
기존 내용의 바깥쪽 태그는 그대로 유지하면서 추가
https://www.thymeleaf.org/doc/tutorials/3.0/usingthymeleaf.html#fragments
th:fragment
fragment 정의
https://www.thymeleaf.org/doc/tutorials/3.0/usingthymeleaf.html#including-template-fragments
이런 기능을 사용하면 header, footer, 부트스트랩, 외부 라이브러리 등 공통으로 쓰이는 부분을 관리하기 쉬워진다.
레이아웃을 적용하기 위해 build.gradle에 의존성을 추가해주자.
dependencies에 추가해주고 reload 하면 추가된다.
절대절대 꼭 꼭 의존성 추가하고 다음으로 넘어가자.
build.gradle
implementation 'nz.net.ultraq.thymeleaf:thymeleaf-layout-dialect'
application.yml 파일도 수정해주자.
spring:
  thymeleaf:
    cache: false
    prefix: classpath:/templates/
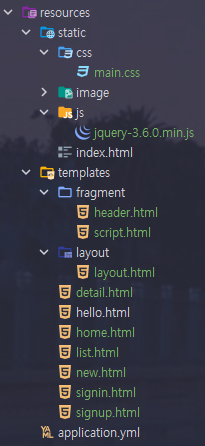
파일 구조는 아래와 같다.
동일하게 만들어주자.
WebController
@GetMapping("/")
public String index() {
    return "home";
}
fragment/header.html
<head th:fragment="headerFragment(title)">
매개변수를 지정할 수 있다.
<!DOCTYPE html>
<html lagn="ko"
      xmlns:th="http://www.thymeleaf.org"
      xmlns:layout="http://www.ultraq.net.nz/thymeleaf/layout">
<head th:fragment="headerFragment (title)">
    <meta charset="UTF-8">
    <title th:replace="${title}"></title>
    <link th:href="@{css/main.css}" rel="stylesheet" />
</head>
<body>
</body>
</html>
fragment/script.html
jQuery는 프로젝트 내에서 가져오고 axios는 cdn으로 가져와보자.
jQuery
axios
https://www.npmjs.com/package/axios
<!DOCTYPE html>
<html lagn="ko" xmlns:th="http://www.thymeleaf.org"
      xmlns:layout="http://www.ultraq.net.nz/thymeleaf/layout">

<th:block th:fragment="script">
    <script type="text/javascript" th:src="@{js/jquery-3.6.0.min.js}"></script>
    <script th:src="@{https://unpkg.com/axios/dist/axios.min.js}"></script>
</th:block>
</html>
layout/layout.html
<th:block th:replace="fragment/header :: headerFragment"></th:block>
th:replace="경로 :: fragment명"
<!DOCTYPE html>
<html lagn="ko"
      xmlns:th="http://www.thymeleaf.org"
      xmlns:layout="http://www.ultraq.net.nz/thymeleaf/layout">
<head>
<th:block th:replace="fragment/header :: headerFragment"></th:block>
</head>
<body >
<div id="wrapper">
    <nav>
        <li>
            <button><a th:href="@{/signup}">회원가입</a></button>
            <button><a th:href="@{/signin}">로그인</a></button>
            <button onclick='logout()'>로그아웃</button>
            <button><a th:href="@{/list}">글 목록</a></button>
        </li>
    </nav>
    <div id="content">
        <th:block layout:fragment="content"></th:block>
    </div>
</div>
<th:block th:replace="fragment/script :: script"></th:block>
<th:block layout:fragment="script"></th:block>

<script th:inline="javascript">

</script>
</body>
</html>
home.html
<!DOCTYPE html>
<html lang="ko"
      xmlns:th="http://www.thymeleaf.org"
      xmlns:layout="http://www.ultraq.net.nz/thymeleaf/layout"
      layout:decorate="~{layout/layout}">
<head th:replace="~{fragment/header::headerFragment(~{::title})}">
  <title th:text="Home"></title>
</head>
<body >

<th:block layout:fragment="content">
  <h1>content</h1>
</th:block>

<th:block layout:fragment="script">
  <script type="text/javascript">
    console.log('Home')
  </script>
</th:block>
</body>
</html>
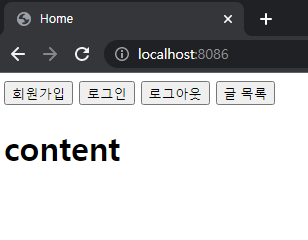
서버를 실행하고 브라우저를 실행해보자.
이렇게 뜬다면 성공 !
개발자 도구를 켜서 콘솔창에 Home도 뜨는지 확인해보자
회원가입
입력 - 아이디, 비밀번호, 비밀번호 확인, 이름
비밀번호와 비밀번호 확인이 일치할 경우에 아이디, 비밀번호, 이름을 POST방식으로 http://localhost:포트번호/api/signup에 요청한다.
클라이언트에서 받은 정보를 Service 단으로 보내 회원 객체를 생성하여 DB에 저장하고 응답이 오면 홈 화면으로 이동한다.
WebController
@GetMapping("/signup")
public String signup() {
    return "signup";
}
signup.html
<!DOCTYPE html>
<html lang="ko"
      xmlns:th="http://www.thymeleaf.org"
      xmlns:layout="http://www.ultraq.net.nz/thymeleaf/layout"
      layout:decorate="~{layout/layout}">
<head th:replace="~{fragment/header::headerFragment(~{::title})}">
    <title th:text="회원가입"></title>
</head>
<body>

<th:block layout:fragment="content">
    <h2>회원 가입</h2>
    <div>
        <form>
            <div>
                <div>아이디</div>
                <input id="id" type="text" name="id"/>
            </div>
            <div>
                <div>비밀번호</div>
                <input id="password" type="password" name="password"/>
            </div>
            <div>
                <div>비밀번호확인</div>
                <input id="confirmPassword" type="password" name="confirmPassword"/>
            </div>
            <div>
                <div>이름</div>
                <input id="name" type="text" name="name"/>
            </div>
            <input class="btn-submit" type="submit" value="회원가입">
        </form>
    </div>

</th:block>

<th:block layout:fragment="script">
    <script type="text/javascript">
        $(function () {
            $('.btn-submit').click((e) => {
                const id = $('#id').val();
                const password = $('#password').val();
                const confirmPassword = $('#confirmPassword').val()
                const name = $('#name').val();

                if (id == '') {
                    alert('아이디를 입력해주세요');
                    e.preventDefault();
                }
                if (password == '') {
                    alert('패스워드를 입력해주세요');
                    e.preventDefault();
                }
                if (confirmPassword == '') {
                    alert('패스워드 확인을 입력해주세요');
                    e.preventDefault();
                }
                if (name == '') {
                    alert('이름을 입력해주세요');
                    e.preventDefault();
                }

                if (password != confirmPassword) {
                    alert('비밀번호가 일치하지 않습니다.')
                    e.preventDefault();
                } else {
                    const path = 'http://localhost:8086/api/signup';
                    const json = JSON.stringify({
                        'id': id,
                        'password': password,
                        'name': name
                    });
                    $.ajax({
                        url: path,
                        type: 'POST',
                        contentType: 'application/json',
                        data: json,
                    }).done((response) => {
                        if (response == 'success') {
                            alert('회원가입 성공')
                            location.href = "http://localhost:8086"
                        } else if (response == 'fail') {
                            alert('아이디를 변경하세요.');
                        } else {
                            alert('회원가입 실패');
                        }
                    });
                }
            });
        });
    </script>
</th:block>
</body>
</html>
이제 코드 한줄한줄 살펴보자.
클래스가 btn-submit인 것을 클릭했을 때
해당하는 아이디의 값을 변수에 각각 담아주고 빈 값이 있는지 체크한다.
$('.btn-submit').click((e) => {
    const id = $('#id').val();
    const password = $('#password').val();
    const confirmPassword = $('#confirmPassword').val()
    const name = $('#name').val();

    if (id == '') {
        alert('아이디를 입력해주세요');
        e.preventDefault();
    }
    if (id == '') {
        alert('패스워드를 입력해주세요');
        e.preventDefault();
    }
    if (confirmPassword == '') {
        alert('패스워드 확인을 입력해주세요');
        e.preventDefault();
    }
    if (name == '') {
        alert('이름을 입력해주세요');
        e.preventDefault();
    }
비밀번호가 일치하지 않는다면 이벤트를 멈추고
if (password != confirmPassword) {
    alert('비밀번호가 일치하지 않습니다.')
    e.preventDefault();
}
비밀번호가 일치한다면 객체에 담아 JSON 문자열로 변환한다.
변환한 것을 json이라는 변수에 담는다.
const path = 'http://localhost:8086/api/signup';
const json = JSON.stringify({
    'id': id,
    'password': password,
    'name': name
});
JSON.stringify()
JavaScript 값이나 객체를 JSON 문자열로 변환한다.
Ajax
우리는 ajax에 대해 이해하고 있어야 한다.
서버와 비동기적으로 데이터를 주고받는 자바스크립트 기술이다.
아래 영상을 보면 이해하기 쉽다.
Ajax가 무엇인지 설명하는 영상 (+CORS, fetch 어쩌구)
Ajax의 장점
1. 웹 페이지 전체를 다시 로딩하지 않고도, 웹 페이지의 일부분만을 갱신할 수 있다.
2. 웹 페이지가 로드된 후에 서버로 데이터 요청을 보낼 수 있다.
3. 웹 페이지가 로드된 후에 서버로부터 데이터를 받을 수 있다.
4. 백그라운드 영역에서 서버로 데이터를 보낼 수 있다.
$.ajax({
    url: path,					// 클라이언트가 요청을 보낼 서버의 URL 주소
    type: 'POST',				// HTTP 요청 방식 (GET, POST)
    contentType: 'application/json',		// 서버에 보낼 데이터의 타입
    data: json,					// HTTP 요청과 함께 서버로 보낼 데이터
}).done((response) => {				// HTTP 요청 성공시 요청한 데이터가 done() 메소드로 전달된다.
    if (response == 'success') {
        alert('회원가입 성공')
        location.href = "http://localhost:8086"
    } else if (response == 'fail') {
        alert('아이디를 변경하세요.');
    } else {
        alert('회원가입 실패');
    }
});
Ajax에 대해 더 알아보고 싶다면 아래 링크를 참고하자.
http://www.tcpschool.com/ajax/intro
코딩교육 티씨피스쿨
4차산업혁명, 코딩교육, 소프트웨어교육, 코딩기초, SW코딩, 기초코딩부터 자바 파이썬 등
tcpschool.com
이제 인텔리제이로 돌아가서 다음과 같이 만들어주자.
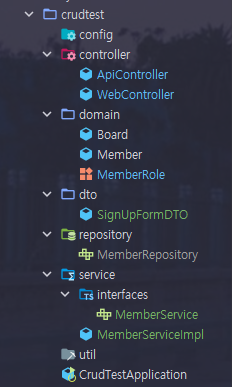
DTO 생성
요청시 데이터를 받아올 DTO가 필요하다.
데이터의 타입을 잘 지정해두고, @Getter, @Setter를 잊지 말도록 하자.
import lombok.Getter;
import lombok.Setter;

@Getter
@Setter
public class SignUpFormDTO {
    private String id;
    private String password;
    private String name;
}
🤔 Entity랑 유사한데 Entity 클래스로 받아오지 않고 왜 DTO를 생성해야 할까?
Entity는 데이터베이스와 맞닿아 있는 핵심 클래스이다.
DTO를 사용하여 View단과 DB단을 철저히 분리시킨다.
화면마다 null 체크 등 요구사항이 다를텐데, 이런 요구사항들을 Entity에 명시하면 알아보기도 힘들고 유지보수도 어렵다.
Repository
인터페이스 생성 후 JpaRepository<Entity 클래스, PK 타입> 상속받기
@Repository를 붙일 필요가 없다.
import org.springframework.data.jpa.repository.JpaRepository;

public interface MemberRepository extends JpaRepository<Member, String> {
}
컨트롤 누르고 JpaRepository를 클릭해보자.
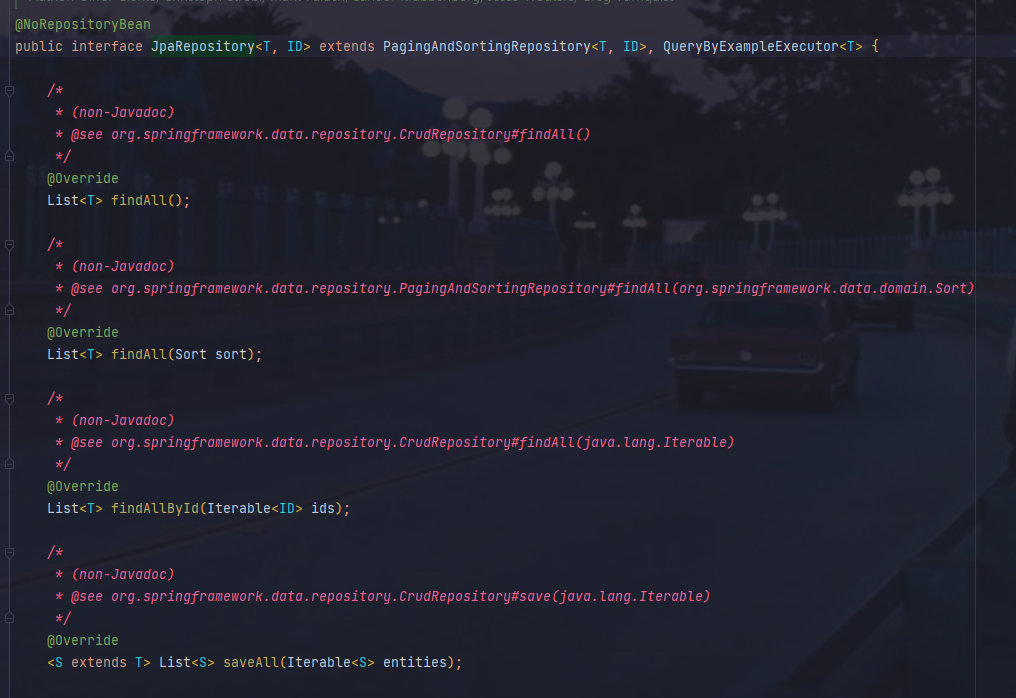
주로 사용하는 메서드들을 알아보자.
findAll() : 모든 엔티티 조회
findById(Id id) : 아이디가 동일한 엔티티 조회
save(T entity) : 새로운 엔티티 저장, 이미 있는 엔티티는 병합
delete(T entity) : 엔티티 삭제
등등 여러 메소드를 제공한다.
Spring Data JPA는 메소드 이름으로 쿼리를 생성해준다.
명명규칙을 알고 있으면 편리하다.
다 외우지말고 필요할 때 공식문서를 찾아서 보도록하자.
https://docs.spring.io/spring-data/jpa/docs/current/reference/html/#jpa.query-methods
Spring Data JPA - Reference Documentation
Example 109. Using @Transactional at query methods @Transactional(readOnly = true) interface UserRepository extends JpaRepository { List findByLastname(String lastname); @Modifying @Transactional @Query("delete from User u where u.active = false") void del
docs.spring.io
Controller
@RestController
@RequestMapping("/api")
@RequiredArgsConstructor
public class ApiController {

    private final MemberService memberService;

    @PostMapping("/signup")
    public ResponseEntity userSignup(@RequestBody SignUpFormDTO formDTO) {
        return memberService.signup(formDTO);
    }

}
@RequestBody
HTTP 요청의 body(JSON이나 XML 등)를 자바 객체로 변환시켜준다.
만약 스프링이 처음이라면 이제부터 본격적으로 머리가 아파진다.
차근차근 공부해보자.
의존성주입 DI Dependency Injection
필요한 객체를 외부로부터 받아서 사용하는 것
객체간 결합도를 약하게 하고 코드를 유지보수 하기 쉽게 만들어준다.
강한 결합
객체 내부에서 다른 객체 생성
Book 클래스는 Paper 클래스의 의존성을 가진다.
Paper 클래스가 수정되었을 때 Book 클래스도 수정해야한다.
public class Book {

    private Paper paper;

    public Book() {
    	paper = new Paper();
    }
}
약한 결합
외부에서 생성한 객체를 주입해준다.
Paper 클래스를 수정하더라도 Book 클래스를 수정할 필요가 없다.
public class Book {

    private Paper paper;

    public Book() {}

    public void Book(Paper paper) {
    	this.paper = paper
    }
}
스프링에서는 여러가지 의존성 주입방법을 제공한다.
1. @Autowired
2. setter
3. 생성자
우리는 생성자 방식을 사용할 것이다.
생성자로 Bean 객체를 받도록 하자.
Spring Bean
Spring IoC 컨테이너가 관리하는 자바 객체를 말한다.
@Component 어노테이션이 등록되어있을 때는 Spring이 Bean으로 등록한다.
@RequiredArgsConstructor
final이 선언된 모든 필드를 인자값으로 하는 생성자를 생성해준다.
클래스의 의존성 관계가 변경될 때마다 생성자 코드를 수정할 필요가 없다.
Service
인터페이스를 먼저 만들고 구현 클래스를 작성한다.
클라이언트에게는 인터페이스를 제공한다.
public interface MemberService {
    ResponseEntity signup(SignUpFormDTO formDTO);
}
@Service
@Transactional
@RequiredArgsConstructor
public class MemberServiceImpl implements MemberService {
private final MemberRepository memberRepository;
public ResponseEntity signup(SignUpFormDTO formDTO) {
Optional<Member> member = memberRepository.findById(formDTO.getId());
if (member.isEmpty()) {
    Member newMember = Member.builder()
            .id(formDTO.getId())
            .password(formDTO.getPassword())
            .name(formDTO.getName())
            .role(MemberRole.USER)
            .build();

    memberRepository.save(newMember);

    return new ResponseEntity("success", HttpStatus.OK);
} else {
    return new ResponseEntity("fail", HttpStatus.OK);
}
}
}
@Service
서비스 레이어 클래스인것을 명시
@Transactional
JPA의 모든 변경은 트랜잭션 안에서 이루어져야한다.
스프링 데이터 JPA가 제공하는 공통 인터페이스를 사용하면 데이터를 변경하는 메소드에 @Transactional로 트랜잭션 처리가 되어있다.
따라서 service 계층에서 트랜잭션을 시작하지 않으면 repository에서 트랜잭션을 시작한다.
서비스 계층에서 트랜잭션을 시작했으면 repository도 해당 트랜잭션을 전파받아서 그대로 사용한다.
@Transaction 어노테이션을 클래스나 메서드에 붙일 경우 해당 범위의 메서드가 트랜잭션이 되도록한다.
더 많은 설명은 아래 링크 참조
https://kafcamus.tistory.com/30
@Transactional 어노테이션의 이해
나는 보통 서비스 코드에 @Transactional 어노테이션을 활용해준다. 그런데 사실 뜻도 잘 모르고 좋다고 그래서 쓴거라...지나고 보니 정확히 설명하기가 어려웠다. 그런고로, 해당 어노테이션의 작
kafcamus.tistory.com
member repository에서 spring data jpa가 제공하는 findById() 메소드를 사용하여 Id가 동일한 객체를 가져온다.
Optional<Member> member = memberRepository.findById(formDTO.getId());
if (member.isEmpty()) {
Member newMember = Member.builder()
.id(formDTO.getId())
.password(formDTO.getPassword())
.name(formDTO.getName())
.role(MemberRole.USER)
.build();
memberRepository.save(newMember);
return new ResponseEntity("success", HttpStatus.OK);
} else {
return new ResponseEntity("fail", HttpStatus.OK);
}Member 엔티티의 @Builder 어노테이션이 빌더 패턴 클래스를 생성하게 해준다.
만약 member가 없다면 컨트롤러에서 받아온 DTO 객체의 값을 이용하여 Member 객체를 만들어준다.
Spring Data JPA가 제공하는 save() 메소드를 이용하여 DB에 저장해준다.
domain.MemberRole.java
public enum MemberRole {
    USER, ADMIN
}
ResponseEntity
HttpEntity의 확장 클래스로 HttpStatus 상태 코드를 추가한 HTTP 응답을 표현한 클래스이다.
만약 저장했다면 sucess를 없으면 fail을 담아서 응답해준다.
이제 서버를 켜서 회원가입을 해보자.


